Manually encrypt a computer using BitLocker (method via Graphical User Interface (GUI)) in Windows 11 or Windows 10
If for some other reason the recommended command-line method of encryption does not work, you can also encrypt a computer with BitLocker using the GUI.
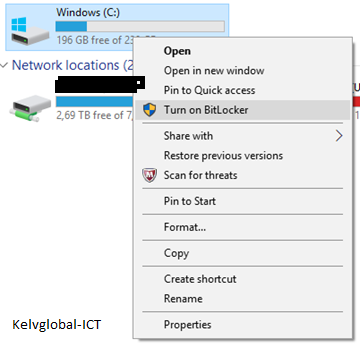
- Right click on your C drive and click select “Turn on BitLocker”. This will start the BitLocker wizard.
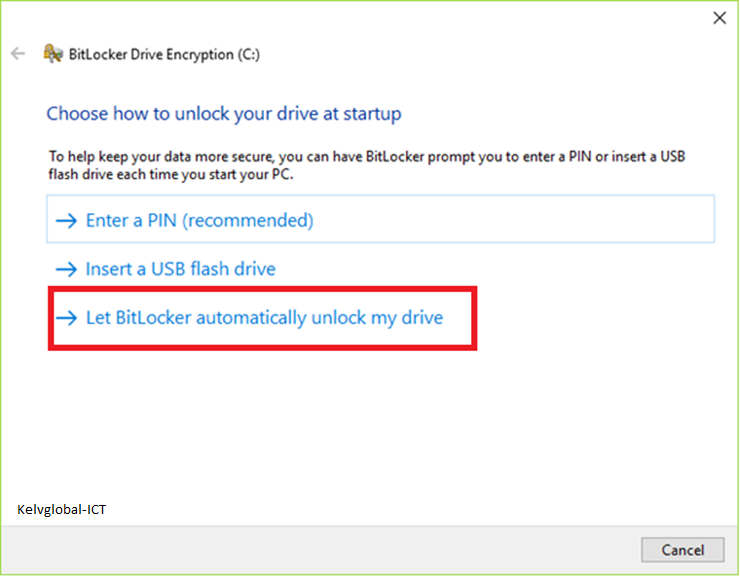
- On the first page, select “Let BitLocker automatically unlock my drive”. This way, BitLocker encryption is completely transparent for the user.
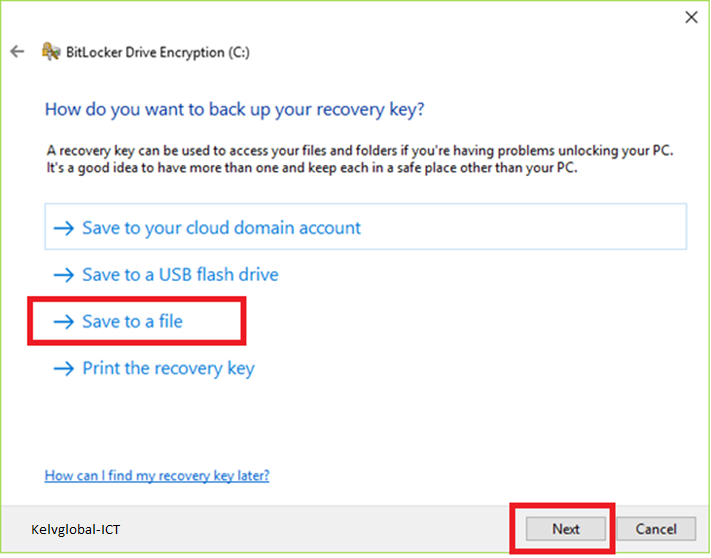
- You need to save the recovery key. Select “Save to a file”, and browse to a network share or external disk drive. It is impossible to save the file to the C drive. Please use the computer name as filename (for example, computername.txt) when saving it.
- When you have saved the file, click Next to continue.
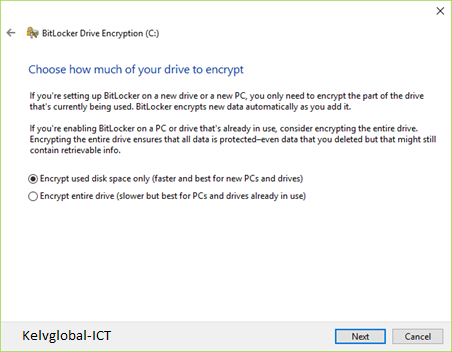
- Choose how much of the drive you want to encrypt:
> “Encrypt used disk space only”: Fine for new PCs
> “Encrypt entire drive”: Preferably encrypt the entire drive for PCs which are already in use and have a lot of data on them
6. Choose the “New encryption mode”:

7. Make sure you check the “Run BitLocker system check”, and click on “Continue” to start:

8. A reboot is required:
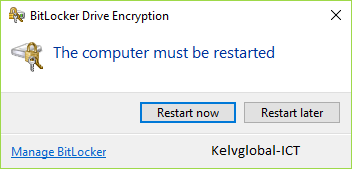
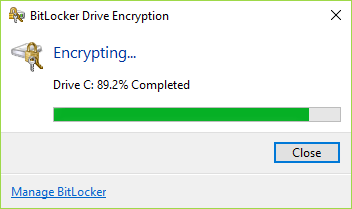
9. After the reboot, you can monitor the encryption process. The computer is ready to use while it is being encrypted.